Building an Authentication API with AWS Cognito and FastAPI
From Configuration to Implementation: Creating an Authentication System for Your FastAPI Projects


Introduction
Software applications nowadays is largely driven by API, and securing access to sensitive data is paramount. User authentication acts as the gatekeeper, ensuring only authorized individuals can interact with your API. Building and maintaining a robust authentication system can be a complex task. Here's where AWS Cognito steps in.
AWS Cognito is a managed service offered by Amazon Web Services. It takes the burden off developers by providing all the infrastructure needed to manage user registration, sign-in, and access control. This allows you to focus on your core API functionalities without getting bogged down in user management complexities.
Combining Cognito with FastAPI's clean syntax creates a powerful duo for building secure and maintainable authentication systems. This article will guide you through configuring Cognito, leveraging Python's boto3 library, and implementing essential authentication endpoints within your FastAPI application.
Prerequisite
This article is designed to be comprehensive and easy to follow, making it accessible to developers of varying skill levels. While the concepts will be explained with code samples, it's recommended to have an intermediate understanding of Python programming, a basic familiarity with FastAPI, and some prior experience navigating the AWS Management Console. With these prerequisites in place, you'll be well-equipped to dive into the implementation of our authentication API.
Setting Up the Stage: AWS Cognito User Pool Configuration
A. Accessing the AWS Management Console
Navigate to the AWS Management Console, and log in with your AWS credentials.
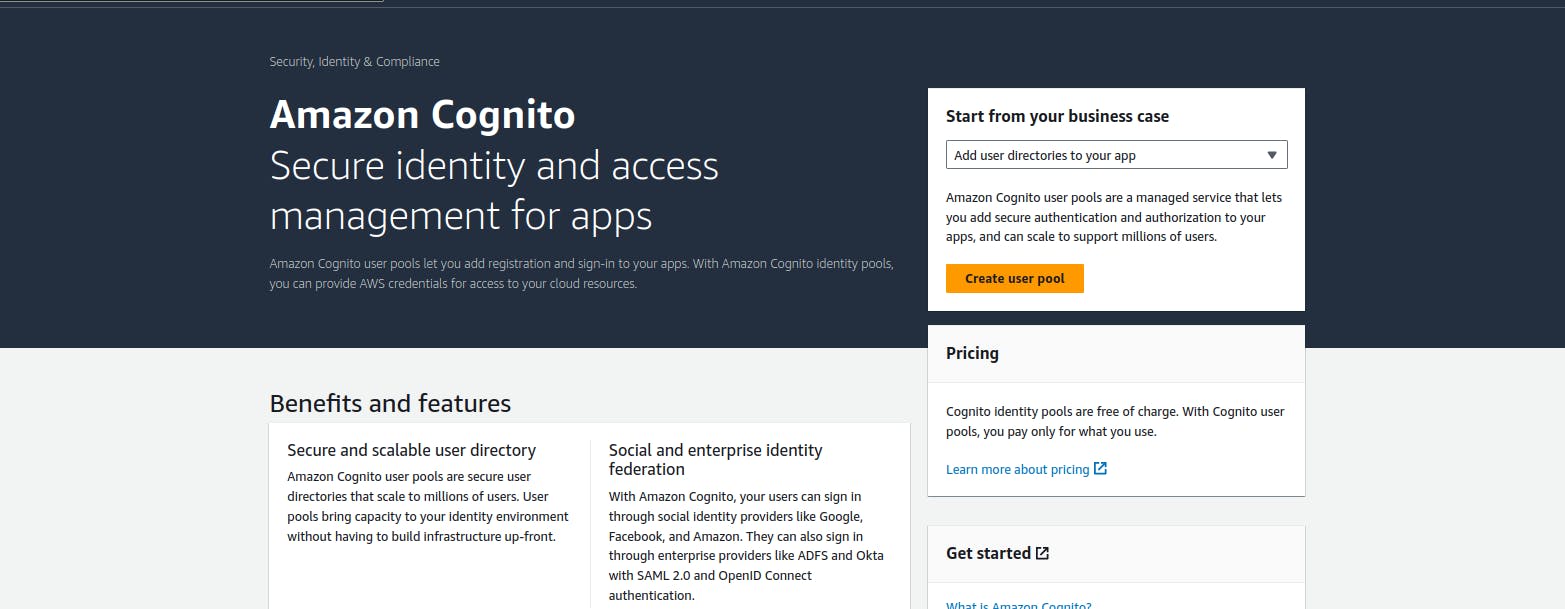
Search for "Cognito" in the search bar and click on "Amazon Cognito" to access the service.
On the displayed page, click on Create user pool as shown below:
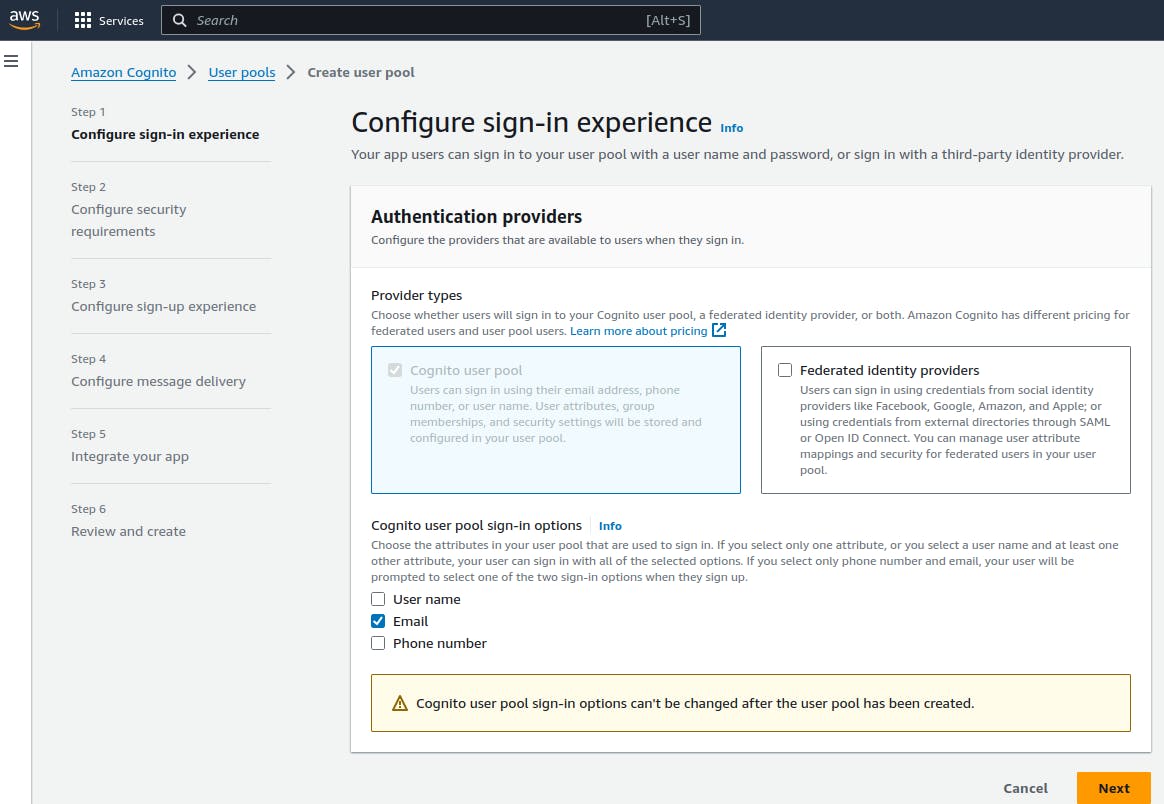
B. Creating a User Pool
- Configure sign-in experience: For this article, we will be allowing user sign-in with only email and password, but the process are the same if you want to accept other options.
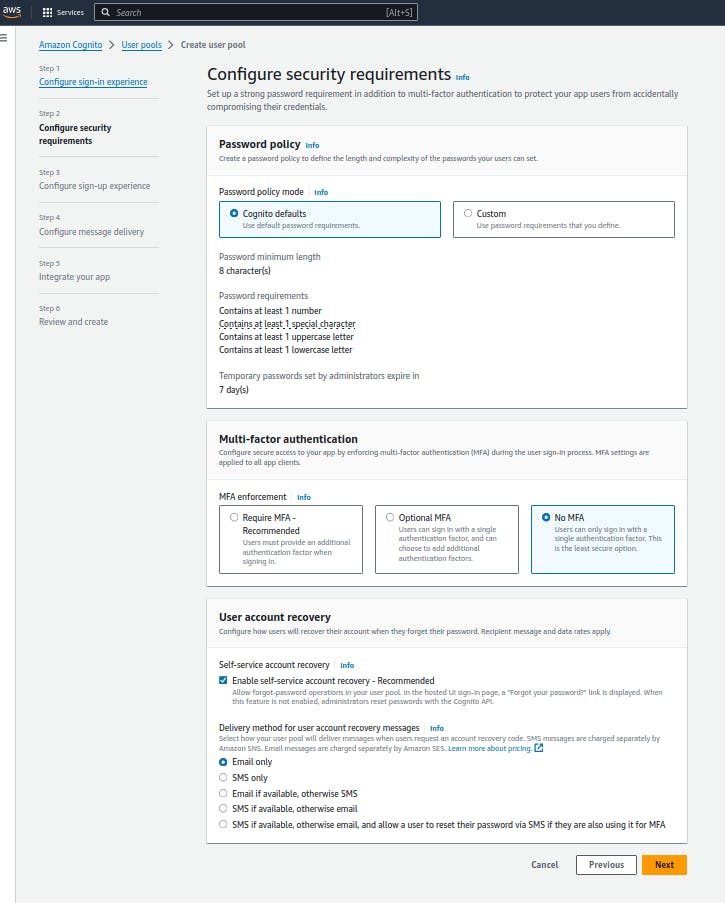
- Configure security requirements: The default password policy provided out-of-the-box by Cognito pretty much fits for most authentication cases, and so we are going to use that.
- Configure sign-up experience: For our sign-up, disable the Enable self-registration option since we are building a backend API, and select all other options as shown below.
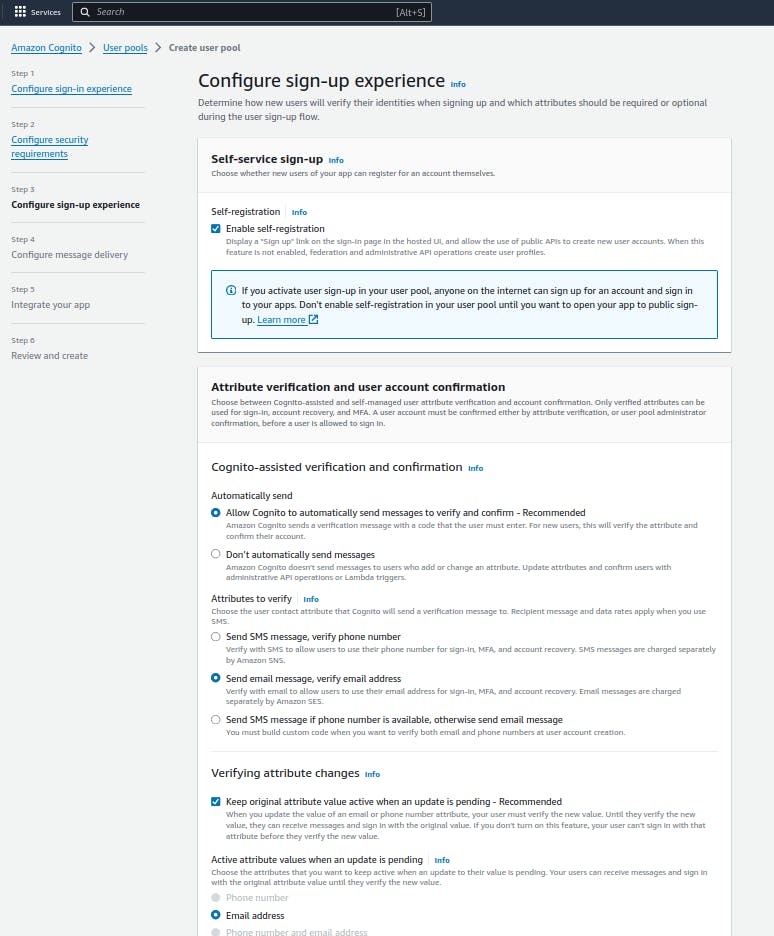
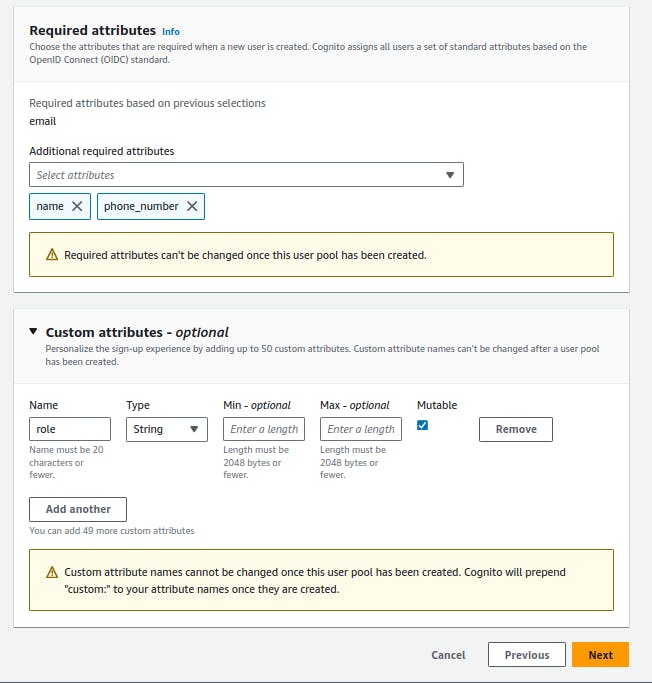
I want to show you how to define normal attributes and custom attributes when writing the application code, so as seen below, let's include two more additional attributes (name, phone_number) and a custom attribute - role, to fields required for user sign-up.
- Configure message delivery: We are going to choose the Send email with Cognito option for a start and to get familiar with how things work without incurring any cost.

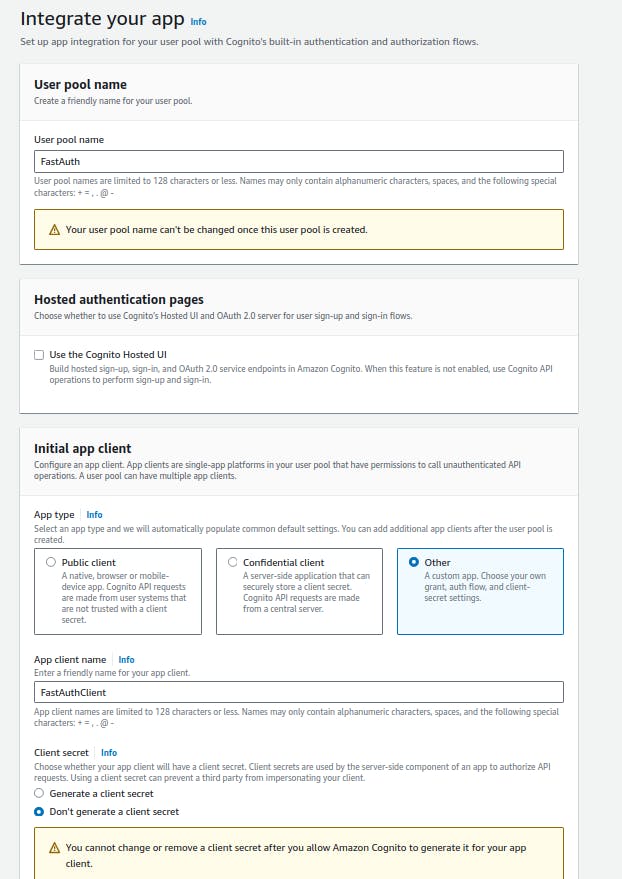
- Integrate your app: For a backend API, you would most likely choose between the Confidential client or Other for the App type. For this article, we will choose Other for a quick start and to give us more flexibility to set our options.
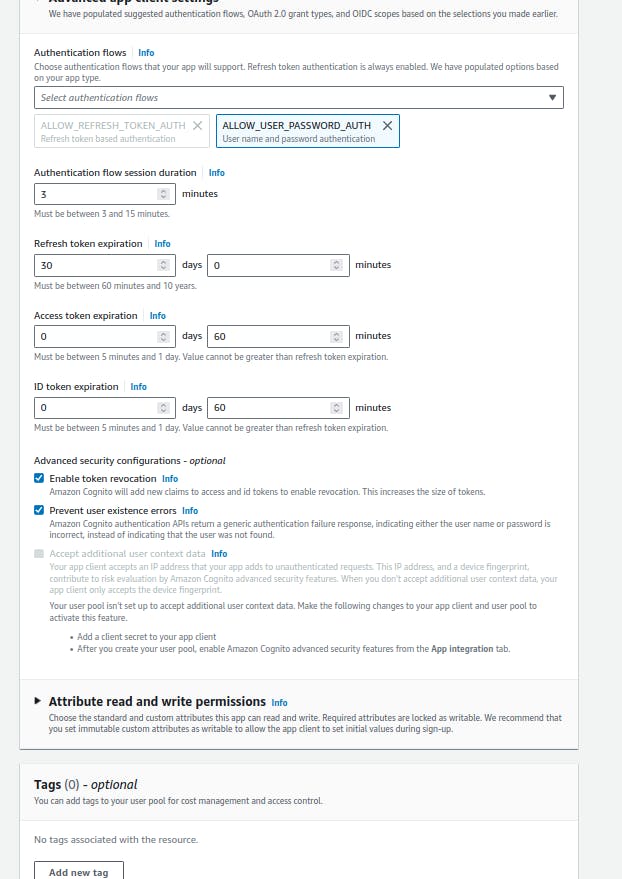
In the Authentication flows section, select the ALLOW_USER_PASSWORD_AUTH, ALLOW_ADMIN_USER_PASSWORD_AUTH, and ALLOW_REFRESH_TOKEN_AUTH to allow sign-in with the set experience in step 1.
Review and create: Review all the previously set configurations and click on create user pool to continue.
Copy user pool details: Go to the details page of the user pool we just created. Look for User pool ID on the page and copy the details. Next, switch to the App Integration tab on the page, scroll down to where you see the App client name you put in step 5, then copy the Client ID. These details are going to be used in our application code.
Building the Stage: Project Structure and FastAPI server setup
- Fastapi Server: Copy the steps below to spin up a quick FastAPI server
1. Create project directory -> mkdir FastCognito && cd FastCognito
2. Initialize virtual environment -> python3 -m venv venv
3. Activate virtual environment -> source venv/bin/activate
4. Install python packages -> pip3 install fastapi uvicorn boto3 pydantic-settings email_validator
5. Create project file structure -> touch .env main.py && mkdir app && cd app && mkdir core routes services models && cd core/ && touch aws_cognito.py dependencies.py config.py && cd .. && cd routes/ && touch auth_route.py && cd .. && cd services/ && touch auth_service.py && cd .. && cd models/ && touch user_model.py && cd .. && cd ..
6. Setup FastAPI server -> main.py
# main.py

from fastapi import FastAPI

app = FastAPI(
    title="FastCognito",
    description="FastAPI Cognito API authentication service",
    version="1.0.0",
)

@app.get('/')
def index():
    return {"message": "Authentication service"}
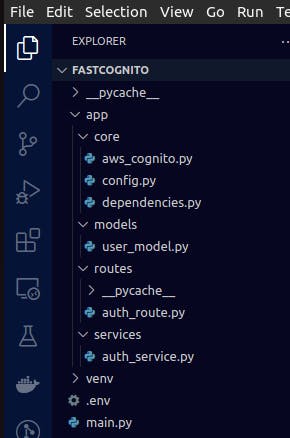
At the end, your project file structure should look as below:
- Environment Configuration: Configure the environment settings in a Pydantic way as shown below, and set the values appropriately in the .env file.
# config.py
from pydantic_settings import BaseSettings, SettingsConfigDict
from functools import lru_cache

class Settings(BaseSettings):
    AWS_REGION_NAME: str
    AWS_COGNITO_APP_CLIENT_ID: str
    AWS_COGNITO_USER_POOL_ID: str

    model_config = SettingsConfigDict(env_file=".env")

settings = Settings()

@lru_cache
def get_settings():
    return settings

env_vars = get_settings()
- Models: Now let's declare some models to validate incoming request body for our APIs
# user_model.py
from typing import Annotated
from annotated_types import MinLen, MaxLen
from pydantic import BaseModel, EmailStr, Field

class UserSignup(BaseModel):
    full_name: str = Field(max_length=50)
    email: EmailStr
    phone_number: Annotated[str, MinLen(10)]
    password: Annotated[str, MinLen(8)]
    role: str

class UserVerify(BaseModel):
    email: EmailStr
    confirmation_code: Annotated[str, MaxLen(6)]

class UserSignin(BaseModel):
    email: EmailStr
    password: Annotated[str, MinLen(8)]
- Interacting with AWS Cognito using boto3: In the code snippet below, we create an AWS_Cognito class instance, initializing a client object for the Cognito Identity Provider service. Within this class, the user_signup method facilitates user sign-up operations by sending the requests to AWS Cognito with user details. This method utilizes the sign_up method from boto3 cognito-idp client.
# aws_cognito.py
import boto3

from ..models.user_model import UserSignup
from .config import env_vars

AWS_REGION_NAME = env_vars.AWS_REGION_NAME
AWS_COGNITO_APP_CLIENT_ID = env_vars.AWS_COGNITO_APP_CLIENT_ID
AWS_COGNITO_USER_POOL_ID = env_vars.AWS_COGNITO_USER_POOL_ID

class AWS_Cognito:
    def __init__(self):
        self.client = boto3.client("cognito-idp", region_name=AWS_REGION_NAME)

    def user_signup(self, user: UserSignup):
        response = self.client.sign_up(
            ClientId=AWS_COGNITO_APP_CLIENT_ID,
            Username=user.email,
            Password=user.password,
            UserAttributes=[
                {
                    'Name': 'name',
                    'Value': user.full_name,
                },
                {
                    'Name': 'phone_number',
                    'Value': user.phone_number
                },
                {
                    'Name': 'custom:role',
                    'Value': user.role
                }
            ],
        )

        return response

    # def verify_account():

    # def user_signin():
    #...
The AWS_Cognito class we created above give us the flexibility to add other methods required for our authentication system, such as for, verifying account, user sign-in, forgot password, change password, logout. Boto3 provide the appropriate methods for implementing these functionalities and more. Click here to check out boto3 documentation to get familiar with all the available methods.
- Make AWS_Cognito class a Dependency: Now we are going to make use of the provided FastAPI dependency injection system, and convert the AWS_Cognito class to a dependency function so that we can use(inject) it in our API route function.
# dependencies.py
from .aws_cognito import AWS_Cognito

def get_aws_cognito() -> AWS_Cognito:
    return AWS_Cognito()
- API Routes: Now we can register our router and create all the necessary API routes.
# main.py
from app.routes.auth_route import auth_router

app.include_router(auth_router)
# auth_route.py
from fastapi import APIRouter, status, Depends

from ..models.user_model import UserSignup
from ..services.auth_service import AuthService
from ..core.aws_cognito import AWS_Cognito
from ..core.dependencies import get_aws_cognito

auth_router = APIRouter(prefix='/api/v1/auth')

# USER SIGNUP
@auth_router.post('/signup', status_code=status.HTTP_201_CREATED, tags=['Auth'])
async def signup_user(user: UserSignup, cognito: AWS_Cognito = Depends(get_aws_cognito)):
    return AuthService.user_signup(user, cognito)

# @auth_router.post()
# async def verify_account():

# @auth_router.post()
# async def signin_user():

#...
- API Services: Our service logic call the injected cognito client dependency which makes the API call to AWS, and the service returns the appropriate API responses.
# auth_service.py
from fastapi import HTTPException
from fastapi.responses import JSONResponse
import botocore

from ..core.aws_cognito import AWS_Cognito
from ..models.user_model import UserSignup

class AuthService:
    def user_signup(user: UserSignup, cognito: AWS_Cognito):
        try:
            response = cognito.user_signup(user)
        except botocore.exceptions.ClientError as e:
            if e.response['Error']['Code'] == 'UsernameExistsException':
                raise HTTPException(
                    status_code=409, detail="An account with the given email already exists")
            else:
                raise HTTPException(status_code=500, detail="Internal Server")
        else:
            if response['ResponseMetadata']['HTTPStatusCode'] == 200:
                content = {
                    "message": "User created successfully",
                    "sub": response["UserSub"]
                }
                return JSONResponse(content=content, status_code=201)

    # def user_verify(data: UserVerify, cognito: AWS_Cognito):
    # def user_signin(data: UserSign, cognito: AWS_Cognito):
- Testing: Now we need to run the server and test the API to ensure that it all works as expected.
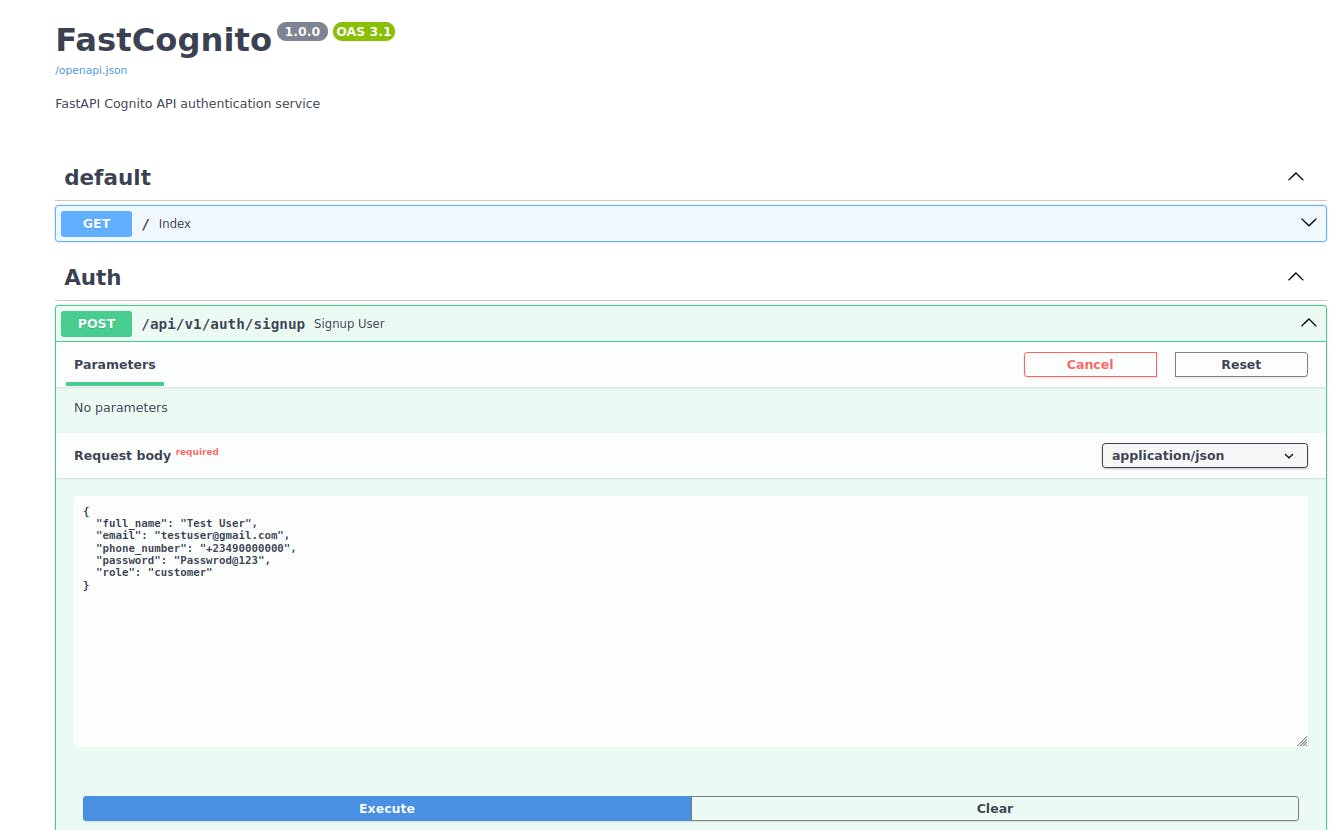
After a successful response from the sign-up API, go to the user pool we created initially on the AWS management console, the created users will be listed there. Also, a confirmation code which will be used to verify the user would have been sent to the email address.
Next Steps
This tutorial focused on the core concepts. To explore the complete FastAPI application with all the implemented authentication APIs, check out the accompanying code on my GitHub repository.
Conclusion
That's it for now guys. I hope you gained a solid understanding on how to leverage AWS Cognito to transform strangers to verified users on your application. Feel free to drop a comment if you have any question. Happy Coding! ❤️💡